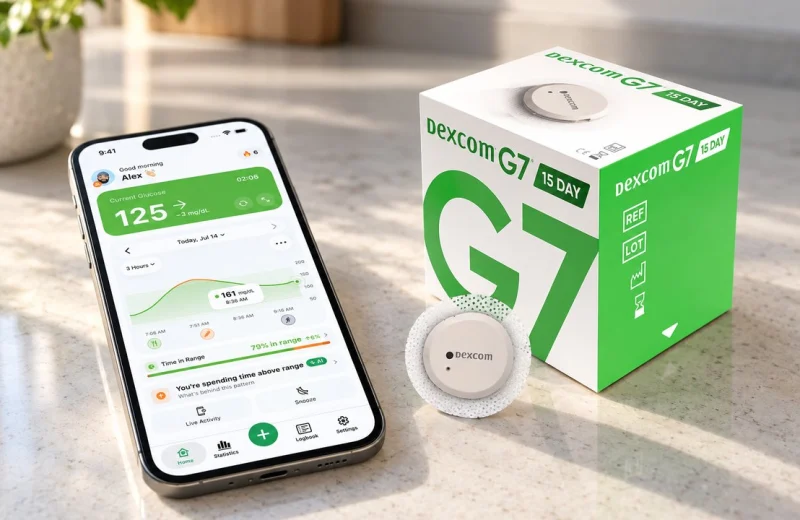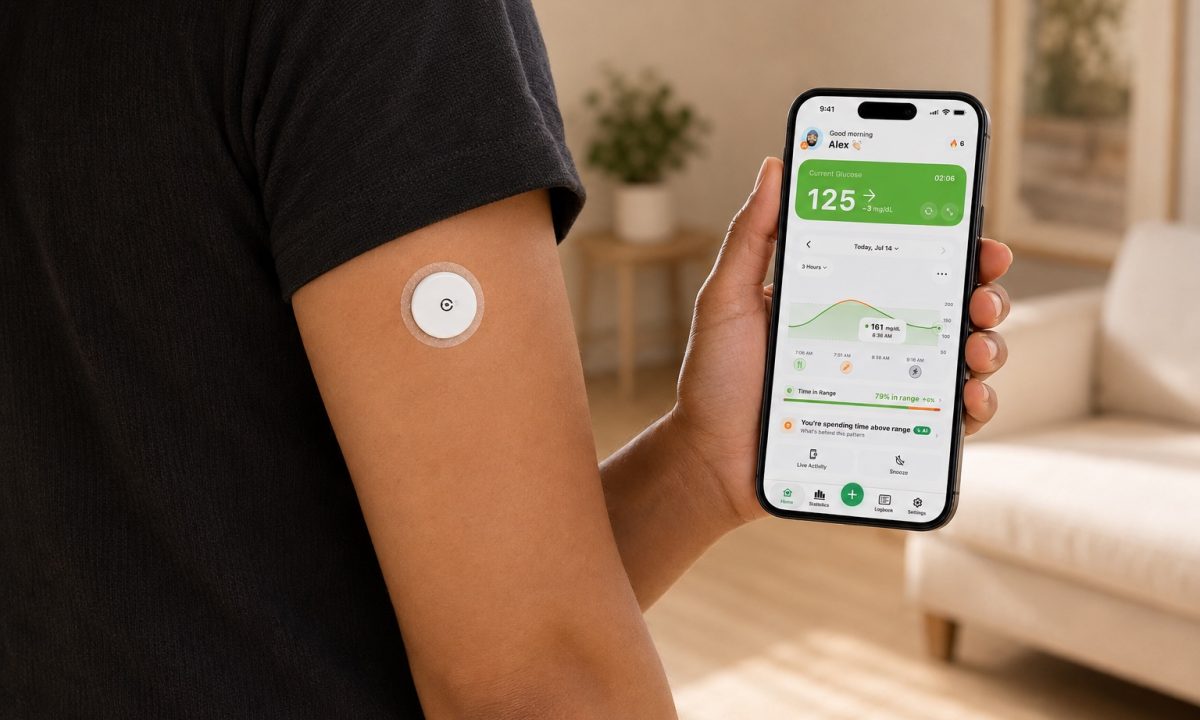
A CGM, short for continuous glucose monitor, is a small wearable sensor that reads glucose in the fluid under your skin every few minutes, day and night, and sends each reading to a phone, watch or dedicated receiver. Instead of one number from a fingerstick you get a curve, a direction of travel and an alert when you drift too high or too low. Most sensors sit on the back of the upper arm and are worn for 10 to 15 days.
If you live with type 1 or type 2 diabetes, follow someone else’s numbers as a parent or partner, or are simply curious what that diabetes sensor on a friend’s arm does, this is the practical baseline: how a CGM works, what it measures, how to read the arrow, what Time in Range and alerts add, where you wear it, what it costs, and what to expect from your first sensor.
The short version, before the details:
- A CGM measures glucose in the fluid under your skin, not in your blood.
- Readings arrive automatically every 1 to 5 minutes, including while you sleep.
- The trend arrow often matters more than the number next to it.
- All those readings make Time in Range possible, which a fingerstick cannot give you.
- It is a monitoring tool, not a decision maker: treatment choices stay with your healthcare team.
On this page
What a CGM actually measures
A CGM does not sample blood. It reads glucose in interstitial fluid, the thin fluid sitting between the cells just under your skin, and turns that into a glucose value on your screen. The National Institute of Diabetes and Digestive and Kidney Diseases describes it the same way in its overview of continuous glucose monitoring.
The glucose sensor’s working end is a soft filament, thinner than the needle used for a fingerstick, sitting a few millimetres below the surface. It carries an enzyme, usually glucose oxidase. When glucose reaches the enzyme, a reaction happens and produces a tiny electrical current. More glucose, more current. The electronics measure that current, apply the sensor’s factory calibration and hand your app a number.
That is the whole trick. No blood, no light shining through your skin, no cuff. Just chemistry and a very small amount of electricity, repeated hundreds of times a day.
The parts you wear
Every CGM system has three jobs: sense, transmit, display. Older systems used three separate pieces for that. Current ones usually merge the first two into a single patch you throw away at the end of wear.
- Sensor: the filament under the skin plus the adhesive patch holding it in place, typically on the back of the upper arm, and on the abdomen for a few older systems.
- Transmitter: the radio that pushes readings over Bluetooth. In FreeStyle Libre 3 and 3 Plus and in Dexcom G7 it is built into the sensor itself.
- Display: a phone app, a smartwatch face, a reader device, or an insulin pump screen, showing the current value, an arrow and a graph of the last few hours.
After you insert a sensor there is a warm-up period before the first reading appears, roughly 30 minutes to 2 hours depending on the brand. Annoying on day one. Then you forget about it for a week and a half. Current sensors are water resistant enough for a shower or a swim, within the depth and time limits printed on the box.
One distinction worth knowing: all of the current sensors are real-time CGMs, meaning they push every reading to your phone on their own. The older scan-to-read kind, sometimes called flash or intermittently scanned monitoring, showed a number only when you held the phone to the sensor. Our alerts guide explains what makes a CGM real-time and why it matters at 2 a.m.
Where do you wear a CGM?
Placement is set by the manufacturer’s labelling, not by preference. Dexcom G7 is approved for the back of the upper arm for ages 2 and up, and the upper buttocks for children aged 2 to 6; the abdomen, an approved site on the older G6, is not on the G7 list. The G7 15 Day is arm-only and adults-only. Abbott’s FreeStyle Libre 3 and 3 Plus go on the back of the upper arm, full stop.
Two habits matter more than the exact spot. Rotate sites between wears so the skin heals, and avoid places where a waistband, a seatbelt or your sleeping position presses on the sensor, because pressure is what produces a compression low.
Why does the number differ from my fingerstick?
Because the two are measuring different fluid at slightly different times. A fingerstick reads blood; a CGM reads interstitial fluid, and glucose gets there a little later, so when your levels are moving fast the sensor trails behind by a handful of minutes. A fingerstick of 150 mg/dL (8.3 mmol/L) alongside a sensor reading of 130 mg/dL during a sharp rise is not a broken sensor. That is physiology.
The gap shows up most during and after meals, during exercise and while you are treating a low. When everything is flat, the two usually sit close together. If you want the longer explanation, including when a confirmation check genuinely helps, I wrote about why a CGM reading differs from a finger stick.
The arrow beside the number is the part new users underuse. Two people can both read 120 mg/dL (6.7 mmol/L): one flat, one falling steeply. Same number, completely different next ten minutes. A flat arrow means steady, an angled arrow means moving, and a straight-up or straight-down arrow means moving quickly. Direction, then value. That order is worth building as a habit.
Time in Range: what one real day looks like
Because a CGM records a reading every few minutes, it can tell you what percentage of the day you spent inside a target band. That metric is Time in Range, and the band most commonly used for adults is 70 to 180 mg/dL (3.9 to 10.0 mmol/L). The 2019 International Consensus on Time in Range, published in Diabetes Care, set targets of more than 70 percent of the day in that range and less than 4 percent below 70 mg/dL for many adults with type 1 or type 2 diabetes, with looser goals for older or higher-risk people.
Percentages feel abstract until you convert them to clock time. One percent of a day is about 14 minutes. So 70 percent in range leaves about 7 hours outside it, and that 4 percent low ceiling is roughly 58 minutes below 70 mg/dL per day.
Here is a single day drawn from those rules:
- Wake at 6:30 a.m. at 105 mg/dL, flat.
- Breakfast pushes you to 195 mg/dL, and you sit above 180 for about 40 minutes before coming back down.
- A long flat afternoon between 95 and 140 mg/dL.
- Dinner out, a slower rise, about 30 minutes above 180.
- At 2 a.m. you dip to 66 mg/dL for around 25 minutes before drifting back up.
Add the out-of-range minutes: 40 plus 30 plus 25 is 95 minutes, so about 93 percent Time in Range with roughly 2 percent below target. My own Time in Range sits around 85 to 90 percent, and it moves with sleep and travel more than with anything clever I do.
Notice what an A1C could never show you: that overnight dip lasted less than half an hour and would be invisible to any fingerstick schedule a reasonable person would keep.
Alerts, and the part people underestimate
The feature that changes daily life most is not the graph. It is the alert that fires before you feel anything, especially at night. Standard CGM alerts are threshold based: you set a low and a high, and the app speaks up when you cross them. Some systems add a forecast that warns you while you are still in range but heading down fast. Most can also send the same readings to a family member’s phone; our caregiver’s guide to remote glucose monitoring covers that side.
Nighttime lows are my own long-running problem. There were nights when one alarm did not wake me, which is exactly why I wanted a second, independent layer on top of the sensor’s own app, and why a warning that arrives while I am still in range matters to me personally. That is the itch my team and I built Sugar Sense to scratch: our own alerts and a predictive heading-low alert on iPhone and Apple Watch, alongside whatever your sensor’s app is already doing rather than instead of it.
The failure mode to know about is alarm fatigue: alerts set so tight that they fire constantly, until people stop hearing them. It is common enough that a 2013 review of diabetes device alarms was titled “Turn it off!”. The fix usually starts with your thresholds and your alert sounds, and our guide to glucose alarms walks through the asymmetric setup that keeps the low loud and the high quiet.
Limits worth knowing before you start
A CGM is very good and not infallible. Sensor wear time is fixed by the manufacturer: Dexcom lists 10 days for the G7 and 15 for the G7 15 Day that launched for adults in December 2025, Abbott’s FreeStyle Libre 3 runs 14 days and the 3 Plus 15, and Eversense’s implanted sensor is the outlier at a full year. I wear each sensor to the end of its official period and no longer use adhesive overpatches, because I no longer need them. Sensors still come off early sometimes. I caught one on a door frame once, and one of my kids pulled another one off.
Other things that happen to everyone eventually:
- Compression lows. Sleeping on the sensor squeezes the tissue around it and can produce a false low, usually with a fast recovery once you roll off it.
- Signal gaps. Phone out of Bluetooth range, app force-quit overnight, cloud sharing lagging. The sensor keeps logging, but your alerts go quiet.
- Sensor errors. Occasional “check back later” messages during the first day are common and normally clear on their own.
- Interference. Some medications and supplements, notably high-dose vitamin C, can affect certain sensors. Manufacturer labelling lists the specifics.
The rule I follow: if a reading does not match how I feel, I check with a meter. Symptoms outrank screens.
A short checklist for your first sensor
- Ask your clinician which systems your prescription and insurance actually cover, and whether your model is approved for treatment decisions without a confirming fingerstick. Over-the-counter sensors skip the prescription but are paid out of pocket.
- Check your phone is on the manufacturer’s compatibility list before you buy.
- Insert the sensor on clean, dry skin in an approved site, and rotate sites between wears.
- Set your low alert first, then your high, and pick sounds you will genuinely notice at 3 a.m.
- Keep a glucose meter and fast-acting glucose within reach, always.
- Give it a week before judging your data. The first day of any new sensor is the least representative.
- Take your Time in Range and your overnight graphs to your next appointment. That conversation is where the data pays off.
Frequently asked questions
What does CGM stand for?
Continuous glucose monitor, or continuous glucose monitoring, depending on whether someone means the device or the practice; both share the acronym. Two cousins you will meet on spec sheets: rtCGM is a real-time CGM, the kind that pushes readings to your phone on its own, and MARD is the accuracy figure manufacturers quote.
Does a CGM have a needle, and does it hurt?
The applicator uses a needle to place the filament and pulls it straight back out in a fraction of a second. What stays under the skin is a flexible thread thinner than a fingerstick lancet. Most people feel a pinch or nothing at all. A sensor that keeps hurting after the first hour is usually in a bad spot, and manufacturers say to take it off rather than tough it out.
Can you get a CGM without diabetes?
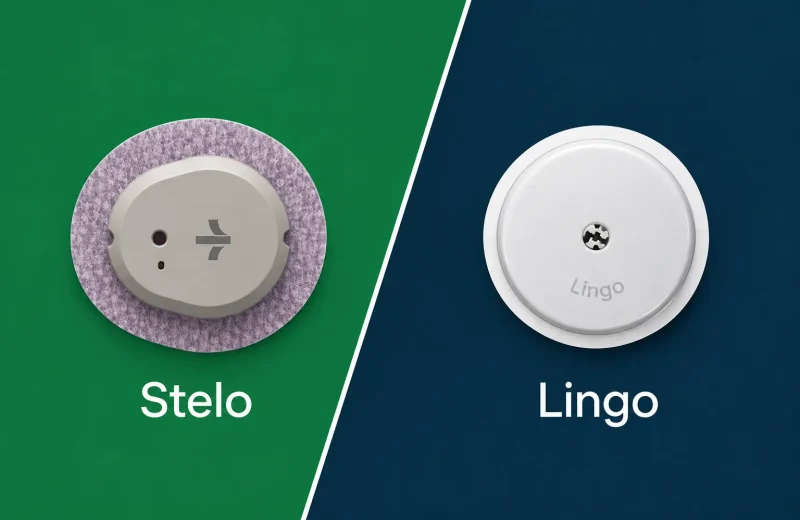
In the US, yes. Dexcom Stelo and Abbott Lingo are over-the-counter sensors cleared for adults who do not use insulin and sold without a prescription; our Stelo versus Lingo comparison covers what they show and what they leave out. Anyone treating diabetes with insulin still needs the prescription systems, because the over-the-counter ones are not built around low-glucose alerts.
How much does a CGM cost?
The over-the-counter sensors are the cheapest way in: Stelo lists at $99 for two sensors and Lingo at $49 for one, prices checked in September 2026. Prescription systems are usually billed through insurance, and in the US Medicare has covered a CGM since 2023 for anyone treated with insulin or with a history of problematic lows, as the American Diabetes Association summarizes. Without coverage the list prices are several times the over-the-counter figures, which is why the coverage question in the checklist above is the one to settle first.
How accurate is a CGM?
Accurate enough that the current systems are approved for treatment decisions without a confirming fingerstick. Manufacturers quote accuracy as MARD, the average gap from a lab reference: Dexcom publishes 8.2 percent for the G7 in adults and Abbott 7.9 percent for the Libre 3, the same ballpark, with the widest gaps during fast changes and on the first day of wear. The fingerstick section above explains when a double-check is worth it.
How do you remove a CGM?
Peel the adhesive patch back slowly like a bandage, from the edge towards the filament; warm water in the shower or a little baby oil around the edge loosens it. The filament comes out with the patch. The used applicator holds the needle and belongs in a sharps container, while the sensor patch follows your local rules for small electronics. Let the next site be clean and dry before the new sensor goes on.
Everything above is general education, not a treatment plan. A companion app like ours displays data your CGM already produces; it does not replace the sensor, the manufacturer’s own app or the alarms built into them, and it should never be your only safety net overnight. Anything that changes your medication or your glucose targets belongs to you and your clinician together, and the full medical disclaimer explains where that line sits.